Monday, September 9, 2013

Laundry Room Reveal

Finally after weeks of teasing you, its here!!! The Laundry Room reveal! The baskets arrived on Friday and I could barely contain myself from posting the reveal that very day. I can't describe what a good feeling it was to finally finish another room in the house. And all by myself! Painting and everything. Patting myself on the back right now. It was so fun to look at the room as a blank slate, imagine all the different ways to make it new and pretty and then turn the dream into a reality. I might have a new addiction. I could not be happier with the outcome and I can't wait to do the same thing to every other room in the house! I won't leave you in suspense any longer. Here are the before and after photos.

Before:


See my mountain of a laundry pile? Yeah, that was my "system".

Whoever owned this house before had all these cheapy, wirey things hanging all over. Those had to go.

The one thing I did like about the room before is that it had these nice Elfa shelves on one side.....note, on ONE side. I hate it when things don't match!

I had everything organized into sections that made sense (at least to me), but it just didn't look nice. And then after some paint and some hard work........


AFTER!!!!:
Above the door to the laundry room I placed (and correct me if I'm wrong people. Please! Don't let me be the idiot who got it wrong and said something like, poop) the French word for "Wash". I kind of decided to go for a French theme and thought this would be a great sign above the door that was a little different than the common, "Wash" letters.


The first thing that had to be done was to paint the room. A pale Robin's Egg Blue, of course. What else?There were dents and dings all over the place. So I got to use that pink spackle-y stuff for the first time. That was fun. Oh yeah and painting behind the washer and dryer? Lets just say I pulled out some acrobatics I didn't know I had, climbing over those hundreds of times. But I was committed! And just the fresh coat of paint alone made the biggest difference in the look of the room.

See the picture of the Eiffel tower back there? When I was dreaming up designs for the room, the one thing that I wanted to accomplish was the feeling of getting away when I stood there folding laundry. I started imagining places I would love to think of when matching those annoying socks. I thought of French women hanging their laundry on clotheslines outside their windows to dry and I thought, "Yeah, no one could be unhappy doing laundry in France." Why? Because they are in FRANCE! duh! So I knew then that I had to find the perfect picture that I could look at while folding and be transported to one of the most beautiful places in the world. I love this one that I found on allposters.com. One, because it is not the typical photo of the Eiffel tower and two, because it is looking up at it, as if I really WAS hanging laundry on clotheslines under it. 

Here you can see my new baskets (yes the one's that held up this post for so long) from World Market. I really struggled to find baskets that fit well into the shelving that was already installed. I bought some larger ones first, but they ended up just looking monstrously huge and overwhelming. Then there was really no middle option between those and these ones. I do like that they are "chicken wire". I think I will end up making my own liners for the baskets. Something white and with a ruffle, (a little more Frenchy) but for now they work great. Its just so nice not to see all the ugly things inside of the baskets. It just makes the whole room look more polished and put together. I would also like to make some chalkboard tags to attach on each basket. Although I know exactly what's inside each one, I think my husband would appreciate the labels.

These baskets I got from Container Store. Once again, I want everything they have in there! I love this natural color of basket and they fit into the space perfectly!
 My utility sink. I don't know WHAT the previous owners did it that sink, but my gosh, it needed some cleaning.


Every "French" laundry room needs Lavender! I got this from a local grower. She was very sweet and gave me all kinds of tips for using it (like putting a lavender sachet in the dryer to make your clothes smell amazing) but this one is just for show.

While I was re-doing the laundry room, I found this old picture that I bought on the streets of Paris. I decided that it now belonged in my French laundry room. And I thought it was slightly ironic....you know....because dirty things get washed in the laundry room? Haha. I'm so very clever.

I found this adorable little basket on sale at Target and knew I had to get it for this project. It fits perfectly with the wall color and its the perfect size for keeping stray buttons, stain remover pens and other little lost things.

I am so proud of my diy utility tub skirt. Tutorial to come soon. How adorable is the toille print that I happened to find on sale? Perfection. It really is the statement piece of the room. Utility tubs are such eyesores! Every one of them needs a skirt! And this one is great because it is attached with velcro, so it can easily be taken down for washing. 
Underneath I hid the good ole spot bot (which gets used about every day) and the garbage can. I could have looked for a cutesy garbage, but then I never like seeing the plastic liners, so I thought it was easy enough to hide this under the skirt as well. After all, all this garbage is used for is lint!

Wondering what that thing is hanging on the left wall? Well, let me show you....

Found this idea on Pinterest and customized it to my theme. It was a really fun nap time craft. Such a fun idea for keeping those stray lost socks. I always hated having them just sit at the bottom of the laundry basket for weeks. This way, I can see what I'm missing and if the "sole mate" doesn't show up after a while, the other gets tossed.

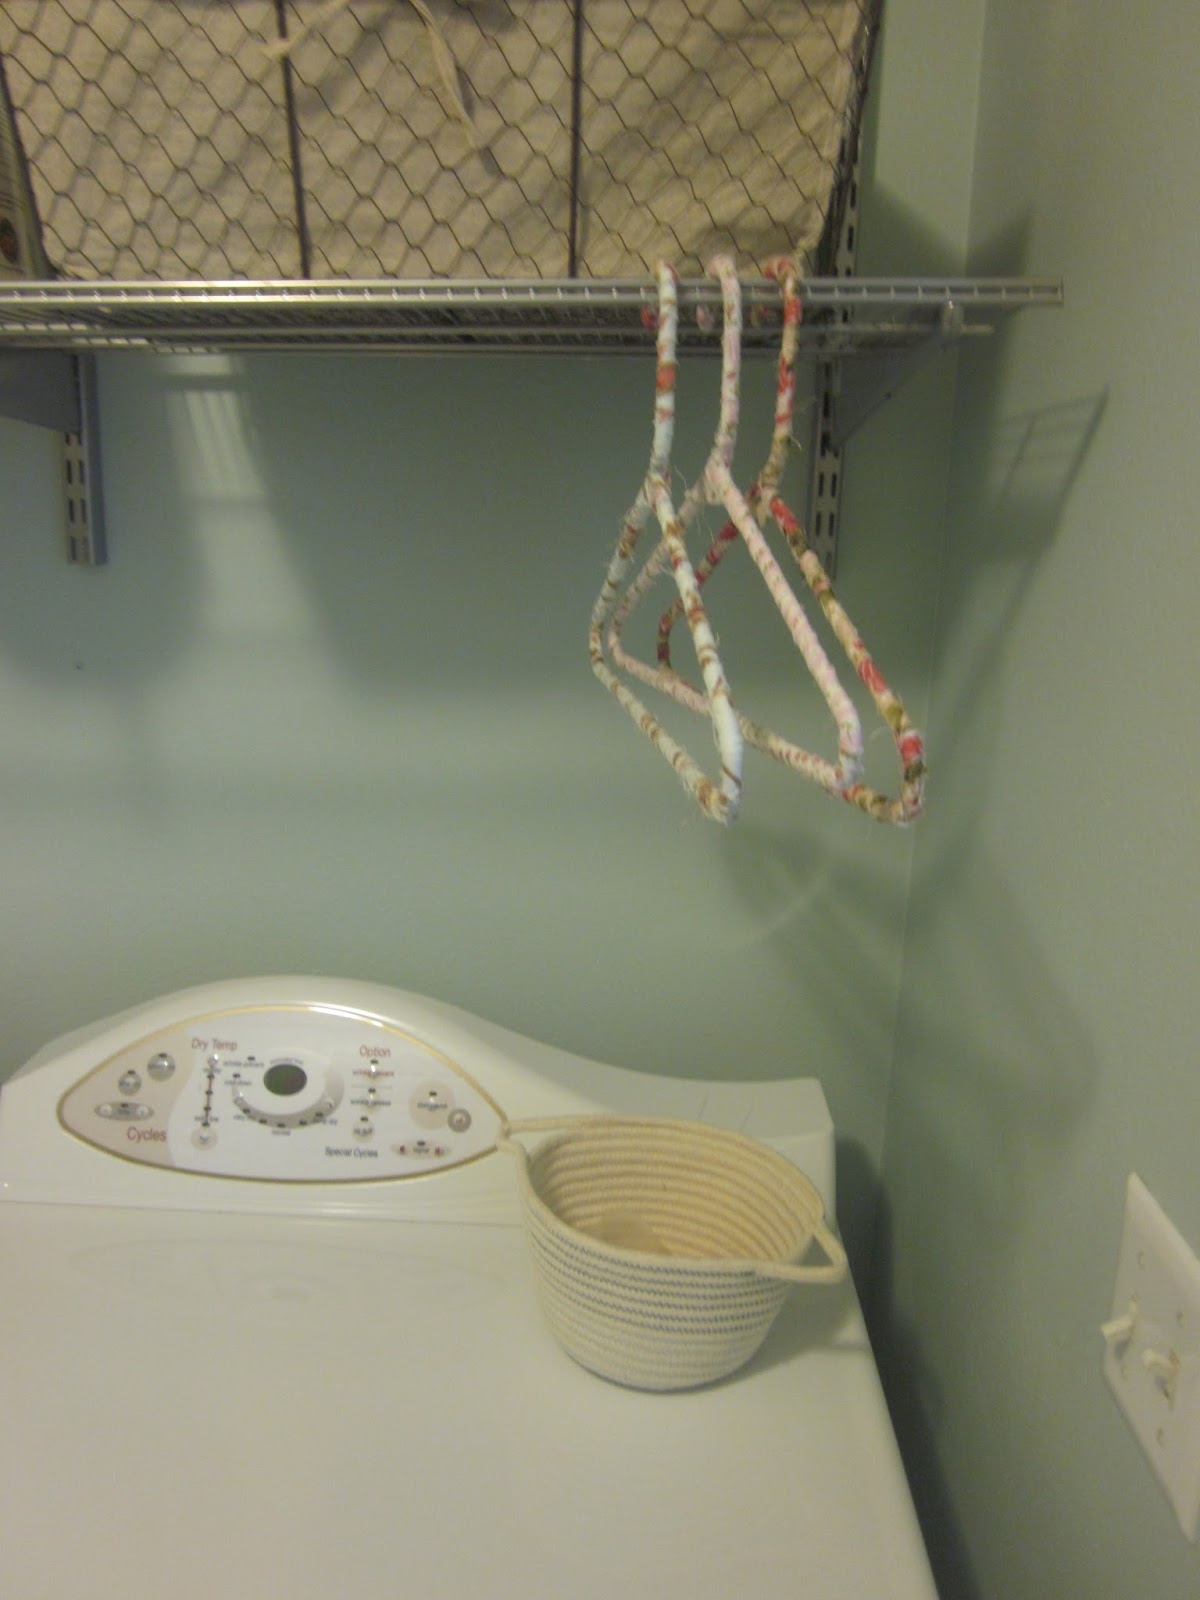
There are my Fabric Wrapped Hangers that I showed you last month. I love them so much. They have worked great for hanging my clothes to dry. I wish I had the patience to do this to all the hangers in my closet! I have also noticed that they are great "non-slip" hangers. Bonus!
The End. Here is my laundry room saying goodbye. Hope you all enjoyed seeing my laundry room makeover and hopefully it has inspired some projects of your own! I am already working on my next room's makeover, but I won't tell you anything more than that until it is finished!

Friday, September 6, 2013

Free People September Issue

Its no secret that I love Free People. I would love for my entire wardrobe to be 100% made up of Free People clothes. But sadly, I'm no millionaire and getting FP clothing is a huge treat. Anyway, I had to share with you today my absolute excitement on receiving their September catalog. I nearly died. Such gorgeous clothes! How do they come up with this stuff? And how is it that with each new catalog they still keep things coming that I am totally in love with. Its like they are reading my MIND! Allow me to share with you a few pages magnificence. I mean you open the first page and BOOM!

I of course gravitated towards the fur in the middle. Her dress, her booties, her hat. Is it Christmas yet???Then you turn the page and....
Beautiful. I am actually not a fan of the cropped skinnies. Not many people can pull them off and I don't think they are very flattering. If they were normal length they would be great. The pattern is so pretty though. And I adore her coat and booties. I am not usually a huge shoe person, but these are so funky cool. She looks like she is walking the streets of Paris. Oh wait, she probably is.
And speaking of Christmas......
How COZY do these outfits look for December?  I mean, I would be down to wear them the entire month. Like every single day. Shut the front door, cause FP just made flannel print dresses look cool.

 And this one. I mean really? I think FP clothing designers are sneaking into my room at night and tapping into my brainwaves. Maybe that's why I haven't been sleeping well.

How about this gorgeous (albeit ridiculously expensive) number? And its my fav color. The one true color.

I actually have a coat similar to this one that's a little longer and a little thicker. I love it. Its a hand me down from my mother. She and my dad bought matching sheep's wool coats when they travelled to Alaska to see the pope. Years ago. I wasn't even thought of yet. 
I love the elegance of this hat. Such a great cozy piece for Fall. I totally saw a replica at Cost Plus the other day too. Might need to take a trip back there. Her shirt is so sweetly simple. Being a mother of two kind of takes me out of the cropped top equation though.
So, that's what I have been lusting after lately. If you don't get the FP catalog subscription, you should sign up. Its free and even if you don't wear their stuff, its always so pretty to look at. The photography is also very pretty.

Have a great weekend everyone! Oh, and if any of you are wondering if I am ever going to show you the laundry room.....I am. I really am. I promise! I have been WAITING on these baskets for storage for like 2 weeks. Its been taking for freaking EVER to get them! But it should be any day now. And as soon as they come in, the Laundry Reveal shall be revealed. Fear not.

Thursday, September 5, 2013

Sharpie Mugs

One of the coolest ideas I have discovered on Pinterest is Sharpie Mugs.
DIY sharpie mug
Adorable!

DIY Sharpie mugs by SpaceSays
Such a simple idea and how cool that you can completely customize your own mug, bowl or dish! Now, I have seen some posts from bloggers saying that it doesn't work, it wipes right off as soon as it cools, or it washes off in the dishwasher. So we'll see if this even works! I did find a tip from one blogger saying that you need to have oil based sharpies. They are specific Sharpies made just for writing on wood and glass. I found some just at our local Office Max. To find out if they are oil based, it will say right on the package. If it doesn't say oil based, it isn't.

You will need:
Plain white mug or dish (I made a special trip to the dollar store in Hood River just for this!)
Oil based Sharpie Pens
Your imagination
Rubbing alcohol (just in case you make a mistake)

Start by thinking up what you want to do on your mug. You have to have a very steady hand (unless you use stencils) so take it slow. Draw on the mug any design you can dream up. Place mugs on a baking sheet and bake at 350 degrees for 30 mins. Test to see if completely set. It should not wipe off with water. If you do make a mistake, rub it off with rubbing alcohol BEFORE you set it in the oven. Hand washing it best to keep your designs looking sharp (no pun intended) but if you are brave, they may last through a dishwasher session or two. This project is so fun! I want to do all kinds of dishes now! Its such a neat gift idea too. Paired with a little coffee beans and maybe some homemade coffee syrups? Perfection. 
My French obsession coming out.


This one is for my dad's birthday. He is always telling all of his 6 children, that we are his favorite.


Such a fun project! I have only hand washed them so far, but they are holding strong so far. Good luck and have fun. If any of you do this project, please share. I would love to see your works of art!


Wednesday, September 4, 2013

Beer Bread

Oh cozy September. With your new Fall clothes, golden leaves, rainy days, pumpkins, sweaters and cozy movie nights. I love the changing of seasons. Every season has something special about it. I love the warm clothes of Fall and I love the warm cozy foods. How ironic is it that sweaters just happen to be in season when all the best comfort food is as well? You sometimes need that forgiveness of a sweater, with all the yumminess you MUST consume. One recipe I love to make in the Fall (best paired with warm soup) is Beer Bread. I have 2 versions of this recipe. One that is super easy and one that is a little bit fancy and ridiculously delicious. Here is how to make both.

Easy Beer Bread
Ingredients:
3 Cups Self-rising Flour
2 Tbls. of Sugar
1 (12ounce) Beer

Mix all 3 ingredients together and put in a greased bread pan. Bake at 350 degrees for 1 hour.

Crazy Delicious Beer Bread (adapted from Cooking Light. I kid you not)
1 Tbls. Olive Oil
1/2 Cup chopped yellow onion (can be substituted with shallots or green onion)
1/4 Tsp. Black pepper
1 minced Garlic clove
3 Cups Flour
3 Tbls. Sugar
2 Tsp. Baking powder
1 Tsp. Salt
1 Cup shredded Asiago cheese (Can be Cheddar, Monterrey Jack, Asiago, or Gouda)
1 (12 ounce) Beer (lager, amber....I have tried many different beers and they all taste great in this bread)
2 Tbls. Butter melted
4 Ounces finely chopped Salami. Optional. (sopressata or regular)

Preheat oven to 375 degrees. Heat oil in a small skillet over medium heat. Add onion to pan, cook 10 mins or until lightly browned, stirring occasionally. Stir in pepper and garlic and cook 1 min. Remove from heat. Combine flour, sugar, baking powder and salt in a medium bowl. Make a well in the center of the mixture. Add onion mix, cheese and beer to the center of the well and stir until moist batter forms. Add salami if using. Spoon into greased 9X5 loaf pan. Drizzle with 1 Tbls. butter. Bake for 35 mins. Drizzle remaining 1 Tbls. of butter and bake an additional 25 mins or until a deep golden brown. 16 servings. (Or if you are a normal human and slice normal size slices, 8 servings)
Nevermind the dent on the right side.... I got excited.


Best served warm with a little butter. Enjoy!

Tuesday, September 3, 2013

Peanut Butter Bites

This recipe has been in the family for quite awhile. My mom passed down to me this rad 2 ring rainbow colored recipe booklet some years back and its amazing. Every recipe in it is like 6 ingredients max, and they are all super simple. I tried out many of them back in the day when I was a young, bored teenager. It has some great casseroles too. That's the kind of recipe book it is......casseroles, crock pot wonders and Dr. Pepper cake. So 90's. Anyway, this is one of my very favorite recipes. It's a recipe that makes me want to cry for all those poor people suffering from peanut allergies. They never get to taste this peanuty goodness. (Although the peanut butter can be switched out for almond butter.) Or Reeses...but that's another story. As you can see in the picture below, I also changed the name to something a little more.....ahem. Appropriate. I can hear my brothers laughing.

Here is the original recipe in all its glory.

You will need:
1 Cup Honey
1 Cup Peanut Butter (Almond butter or any other nut butter can be used for people with peanut allergies)
1 Cup Nonfat powdered milk
1/2 Cup Rice Krispies (the recipe says you can use granola or oats, but rice krispies is the only way to go)
1.Mix all ingredients together in a bowl. A rubber spatula works best for mixing. 

Spoon out onto a wax lined baking sheet and either refrigerate (as the original suggests) or freeze. 
I like to freeze mine because you can eat them straight out of the freezer like that and they last longer. Freeze them first on the cookie sheet, then once frozen you can throw them all into a ziplock bag for smaller storage space. You may hate me for showing you this recipe.....sorry! But you're welcome.


Monday, September 2, 2013

Hair Elastics

Happy Labor Day! Hope everyone is enjoying the day.

I am almost embarrassed to show this tutorial today, because its so ridiculous what I've done....I featured hair elastics that you could buy in one of my 1st Brooke's Beautiful Finds and they were like $30....and these cost maybe......MAYBE 10 cents each. Yeeeaaaaah! Talk about an idiot. Well, lesson learned. Sorry for leading you all astray!You can make those cutesy hair elastics that you find in salons and boutiques for mere pennies! And here's how to do it.

1. Buy some colored elastic from the fabric store. You might need to look around a few fabric stores before you find some good colors. But it IS out there. Have them cut 1/4 yard piece for you.

2. Take home. Tie in a knot around your wrist, then burn the edges with a lighter. I cut the ends of mine in an angle so that you look just like the store bought ones. That's it. No kidding. Now you can make cute hair ties for you, your daughters or your girlfriends....for a dime. Literally! Amazing!


Never buying these things at a boutique again!
*Another great way to use this miraculous elastic material is to make them into headbands. Just cut more to your head measurements. They make perfect headbands for working out or wearing out. My head is abnormally shaped or something, because headbands will not stay on my head.....but pretty much everyone else can!