Wednesday, August 13, 2014

Girl's Bathroom Reveal

As promised. The Girl's Bathroom Makeover Reveal. I have been working on this project from start to finish since last October! So it feels so great to finally get it done. Transforming a room and making it into something you love takes so much time. It never happens in a day. And honestly there are still things I could still do to make it better. Two things I really wish I could have done: 1. Switch out the lighting (I imagined a small pretty chandelier near the shower), but replacing lighting and hiring an electrician is expensive. 2. Add a frame around the mirror to make the whole room a bit fancier, but that ended up being impossible because the medicine cabinet was so close to the mirror, there wouldn't have been enough room for a frame. But I figure we are not going to be in this house forever, so as long as its the best it can be now, its good enough for me! I really do love the way it turned out and I am glad that I was able to make it into a bathroom that is not only fun for the girls, but nice enough for when we have company. Without further ado.

BEFORE:  
Here you can see my paint swatches on the wall. This is right before I painted it. Good thing I remembered to take the Before photos!

 I almost forgot about this hideous thing. You'll see what I did to fix its ugliness down below.

I suppose I will never know why builders decide to put that horrible "stage" lighting in bathrooms. Its so unflattering and so ugly! We have it in our master bathroom as well and it just kills me.

Kind of a sad little corner. The one redeeming quality is my beautiful Anthro shower curtain that I just had to have for this bathroom. It was just too fluffy, I couldn't help it.

Boring, boring boring white walls! And to top that off there was this dried glue all along the top of the walls that I had to scrape off before painting. It must have been a wallpaper border that the previous owners had taken off. They forgot a little glue...

There was a point when the whole family was sharing this shower. I am so grateful those days are over!


AFTER:
I painted the whole room a very pretty "Sage green" color. I am quite in love with it. Purple has always been a favorite color of mine, but green has been taking over a little bit lately.

Isn't it just so much better!? No more institution-like white walls.

This typography I bought from an artist, The Painted Arrow. I love it because it is the perfect mantra for my girls, who can be quite dramatic at times....to say the least. I searched and searched for a vintage looking wooden frame for literally months and finally found this one at where? Michaels. Go figure.

The pink glass bottle I had in my room growing up and I think it is so fitting that the girls have it in their bathroom now. And those Sweet Peas? From my garden!!! They smell so yummy.

The girls also got a little soap dispenser update. I made sure it was plastic so that it wasn't broken in a day. I also made sure Princess was able to push it down before I bought it, because those dispensers can be a little tricky for little hands.

I made this hand towel hanger with just a piece of wood, the iron hardware (I found that at a local hardware store. Bigtime score!) and some stain. I love that I was able to incorporate wood elements and also a crown....because as you know, my daughters are princesses.

This is a great green bin (IKEA) that we have had since Princess was a baby. It works great for storing all the bows, headbands, clips, ribbons and any other hair accessories. The little glass cup I found at a garage sale for 25 cents. I had to have it because it goes perfectly with the colors in their bathroom. I use it to hold all of their hair rubber bands.
 

My most favorite change in the bathroom. The replacement towel rack. I made it to match the hand towel hanger and I just love the two pieces so much. So much better than that boring metal bar! Finding towels that I liked was another huge challenge. Finding the right shade of green...a pink that wasn't gross bubblegum pink. I wanted the room to be girly, but not so girly that a guest would feel like they had entered into Barbie's bathroom. I got these two colors and then a coral color. I love that they are bright and fun. The nice thing about the paint color in this bathroom is that if I ever want to tone it down, all I have to do is switch out the towels and little decorations and it will completely change.  


The "Bath" sign I made from wooden letters, gold paint and scrapbook paper to match the colors in the room (bought all at Michaels).


We hung a white shelf above to toilet to give that corner a little more interest. I love this idea that I found on Pinterest of putting a framed picture of your kids having fun in the tub. They are just the cutest memories and what better place to put them?

Then of course you can see my latest DIY. Animal Jars. Perfect for storing little bathroom toiletries

and in my case, potty training treats (bribery) for little miss Peanut.

 Even the toilet looks cleaner with a new coat of paint behind it. Haha!


This is the first piece I bought for their bathroom (Michaels). It was pretty much the inspiration for the whole room. Pinks, greens, fairies and woodland creatures.


Lets not forget about that gorgeous Anthro shower curtain. She's angelic.

 Hers and Hers pottys.

Now that the whole family isn't sharing this bathroom, the girls can finally call it their own.

Kind of a boring picture but I wanted to point out the toiletry shower hanger. I once read that if you want your guests to feel comfortable in your home, you should use the places that they would use, i.e. sleep in the guest bedroom and shower in the guest bathroom. That way you will see if anything can be made more comfortable for your guests or if anything is missing. I wanted to make sure that I added this piece to the shower so that guests had plenty of space to put their things and also so that they could be kept out of reach of the girls. We have had one too many experiences with a razor.
 

 A few last looks at my latest creation.

 And that's that. Hope you enjoyed seeing my Girl's Bathroom Makeover!

Monday, August 11, 2014

Animal Jars

Good morning friends! I hope everyone has been enjoying the Summer. It has been a non-stop busy Summer for us. Weddings, birthdays, date nights, dinners with friends...Every weekend has been packed full and it feels like we can hardly catch up. I'm actually pretty excited for school to start because I feel like we will be forced to slow down then. School nights will become sacred again and weekends will be dedicated to family time. Maybe that's just wishful thinking. Maybe the school year will be busier than this Summer, but I'm really hoping that I'm right so that things can settle down a bit. I have had the girl's bathroom 90% finished since the beginning of the year, but I just haven't had the time to get it completely finished. So over the last week or so I have been putting on the finishing touches so that I can finally call another room in the house, "Finished.". I thought this project was the perfect fun thing to finish up the room. 

Animal Jars

For this project you will need:
Small mason jars or other glass containers (glass condiment jars would be a great size for this)
Little plastic toy animals 
Spray paint in the color of your choice
Super glue and Gorilla glue


1. If the lids on your mason jars separate into 2 parts like these ones, you will want to glue the parts together first thing. Most mason jars are like this, but you may be able to find lids that are one piece. I know that I have a honey jar with a lid that would have worked, but I figured glueing the 2 parts together wasn't such a big deal.

2. Prepare a space to do your spray painting by laying out some cardboard or newspapers or even an old towel.

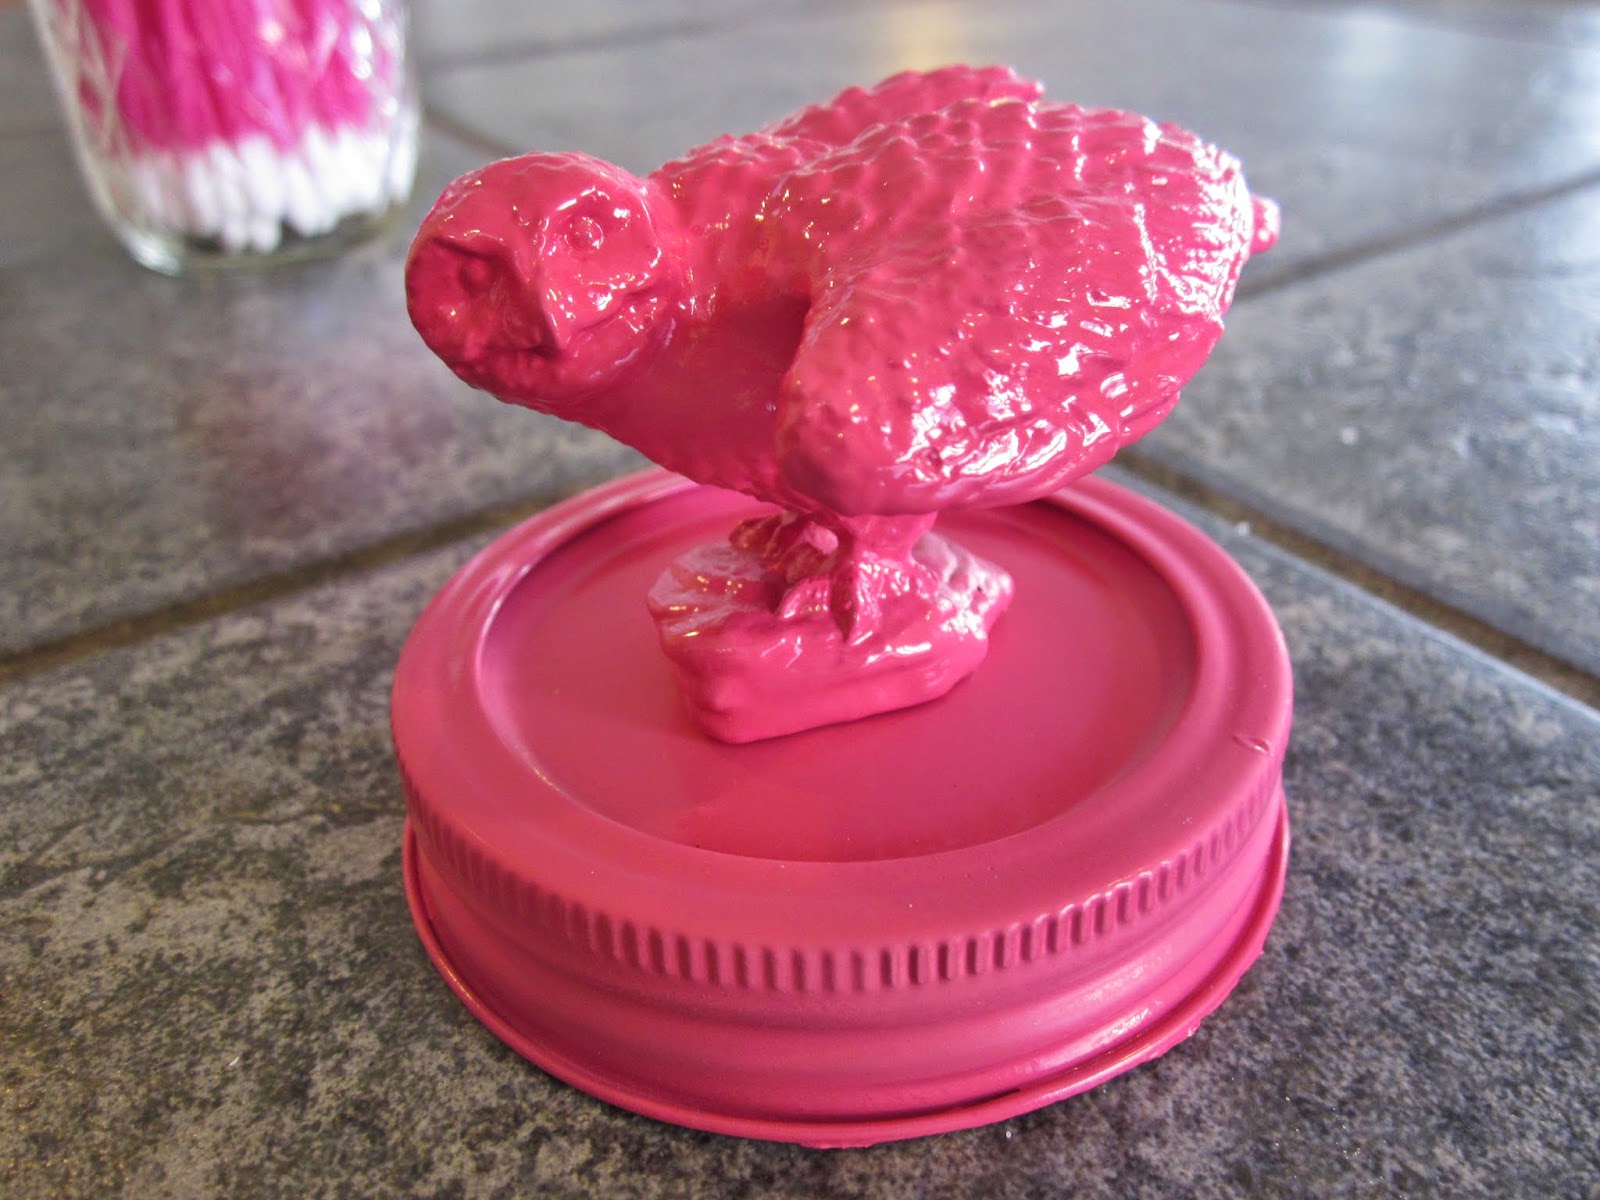
I chose these cute little guys for the animal toppers. I have always been partial to "forest" animals. It went pretty well with the theme of the girl's bathroom as well, which you will see in a day or two. I love the owl and sweet little fawn. And of course I had to have a fox because, well, "What does a fox say?".

3. Spray paint the jar lids and the animal toppers. You may need to do several coats. Allow to dry completely between coats.

4. Dab a tiny bit of Gorilla glue onto the animal paws/claws and then stick them onto the jar lids. Allow to dry.

Then these cute little jar toppers are finished! Here's our foxy fox,

Our sweet little Bambi,

And our wise owl.

These Animal Jars can be used for a variety of things. Use them in bathrooms, guest rooms, kids bedrooms,  the kitchen or just as a little decoration somewhere. They can be painted in any color to match your decor. I used mine to house cotton balls, Q-Tips and since potty training our youngest is on the horizon, I filled Mr. Fox with some bribery jelly beans.


Hope you enjoyed today's post. Stay tuned for the girl's big bathroom makeover reveal!
 

Tuesday, July 22, 2014

Frozen Birthday Party

Well, we somehow survived the great big FROZEN birthday party! My little girl is officially 4, most of the decorations are put away and I am so glad I don't have to plan another birthday party until next year! It was super crazy, (I think we had about 20 adults and 12 kids!) but I think it was a success. I know at least Princess had fun. All she really cared about was getting to play with her cousins and friends (and when I say "play", I mean running around screaming like crazy). I had to talk her into stopping for a second just to eat cake! Just goes to show that you don't need much to please kids. It all came and went in a flurry and the little miss was pretty upset when I had to take the decorations down. It was pretty. Oh well, at least she gets to hang on to the giant sized Elsa, Anna and Olaf. I'm sure they will be permanent fixtures in the playroom for awhile. Here are the pics of Princess's big day. 

The Invitations:
I had a really hard time picking ones that I liked. I'm picky about my Elsas. I ended up ordering a design off etsy.com and then taking them to a printer and then glued them onto thick cardstock myself. No one would print them on cardstock that was heavy duty! I couldn't believe it since that's been so popular lately. I had two different kinds of backing for the invites. White sparkly and blue snowflakes.


The Decor: 
Since this Frozen obsession has been going on in our house for awhile, it was kind of nice because I could use any Frozen toys that the girls had as decoration. Love that toys can be duel purpose for a party!


These girls needed a little hair styling before the party. I wish that doll hair didn't come out so easily. It's impossible to make it look like it did coming out of the box!

Of course Elsa, Anna and Olaf were invited. It wouldn't be a party without Olaf!


Our snowy wonderland.
Oh, and it was so great, my sister in law gave Princess a bubble machine for her birthday and it was perfect for putting outside and giving the effect of snow. My husband originally wanted to get a snow machine for the day, but a bubble machine was the perfect substitute. Not to mention a whole ton cheaper.

Our good old "Happy Birthday" sign. The day of her birthday, Princess kept pointing to the wall saying, "No Mom, it's not a birthday!" and I think she was trying to tell me that I had to put this sign up! Bad Mamma!

We weren't sure if we were going to be able to bring the party into this room or not. My husband was busily building this dining room table at the last minute so that we could have a place for the kids to sit (we have always just used my mother-in-law's folding tables and it was time for an upgrade!). We literally placed the table top on the base of the table minutes before the party started. It's not quite finished yet, but its going to be an amazing table. Look for the post on the table in weeks to come.


At each place, we had a little snowman building activity for the kids to do when they arrived at the party with "Do you wanna build a snowman?" tags I bought off etsy.com. It was great. They loved it. We gave them the choice of taking their "Olafs" home or eating them. Some chose to eat the parts before building. It was perfect because it was age appropriate for a lot of kids. And little miss Princess has friends that are younger and older than her, so this idea worked great for her party.

Each treat bag had 2 pretzel sticks ( for arms), 2 mini chocolate chips (for eyes), 3 mini chocolate brown M&M's (for buttons), 1 candy corn (nose), 3 large marshmallows (body) and 2 small marshmallows (feet). Then I just had a bowl of plain icing on the table for everyone to use as the "glue" to assemble the snowmen.

Our balloon arrangement was not behaving for pictures. 

All of our Frozen themed treats and food. I made the tablecloth with white snowflake print cotton (I'm actually surprised I was able to find snowflakes in June!) and tassels just like the ones on Anna's cape.


The Food:
We had "Snowballs" (Powdered sugar doughnut holes),

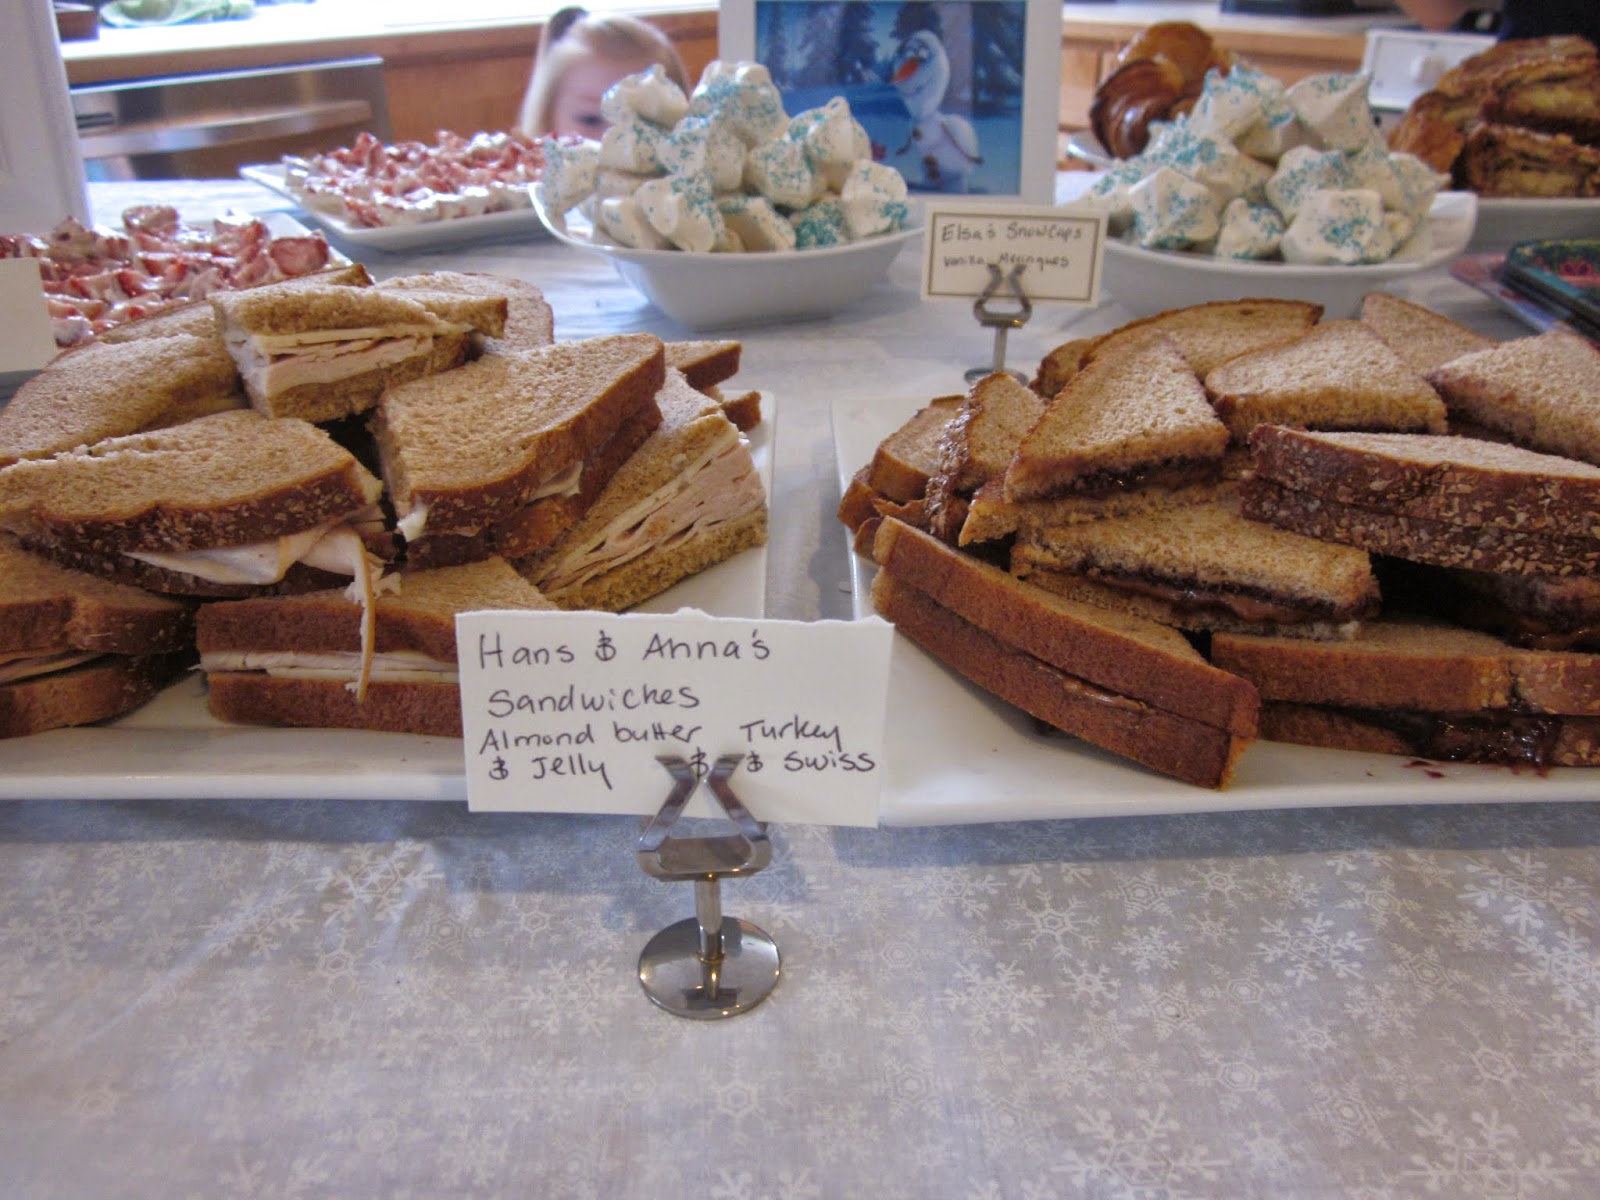
"Hans and Anna Sandwiches" (Almond butter and Jelly and Turkey and Swiss),

"Olaf Noses" (Cut carrots with a Paleo ranch dip), "Troll Clubs" (Corndogs),

"Anna's Frozen Hearts" (Honey yogurt covered frozen strawberries)

"Elsa's Snowcaps" (I just made vanilla meringues using my old meringues recipe and topped them with blue sugar sprinkles),

My sister brought some amazing filled croissants from this French bakery in Seattle that were a great addition for the adults. :)

And of course we had to have some "Elsa's Icey Blue Punch" (basically a mix of blue Kool Aid packets, Sprite, raspberry lemonade and water) to wash everything down. And it was especially good post party mixed with a little champagne :)

The Fun:
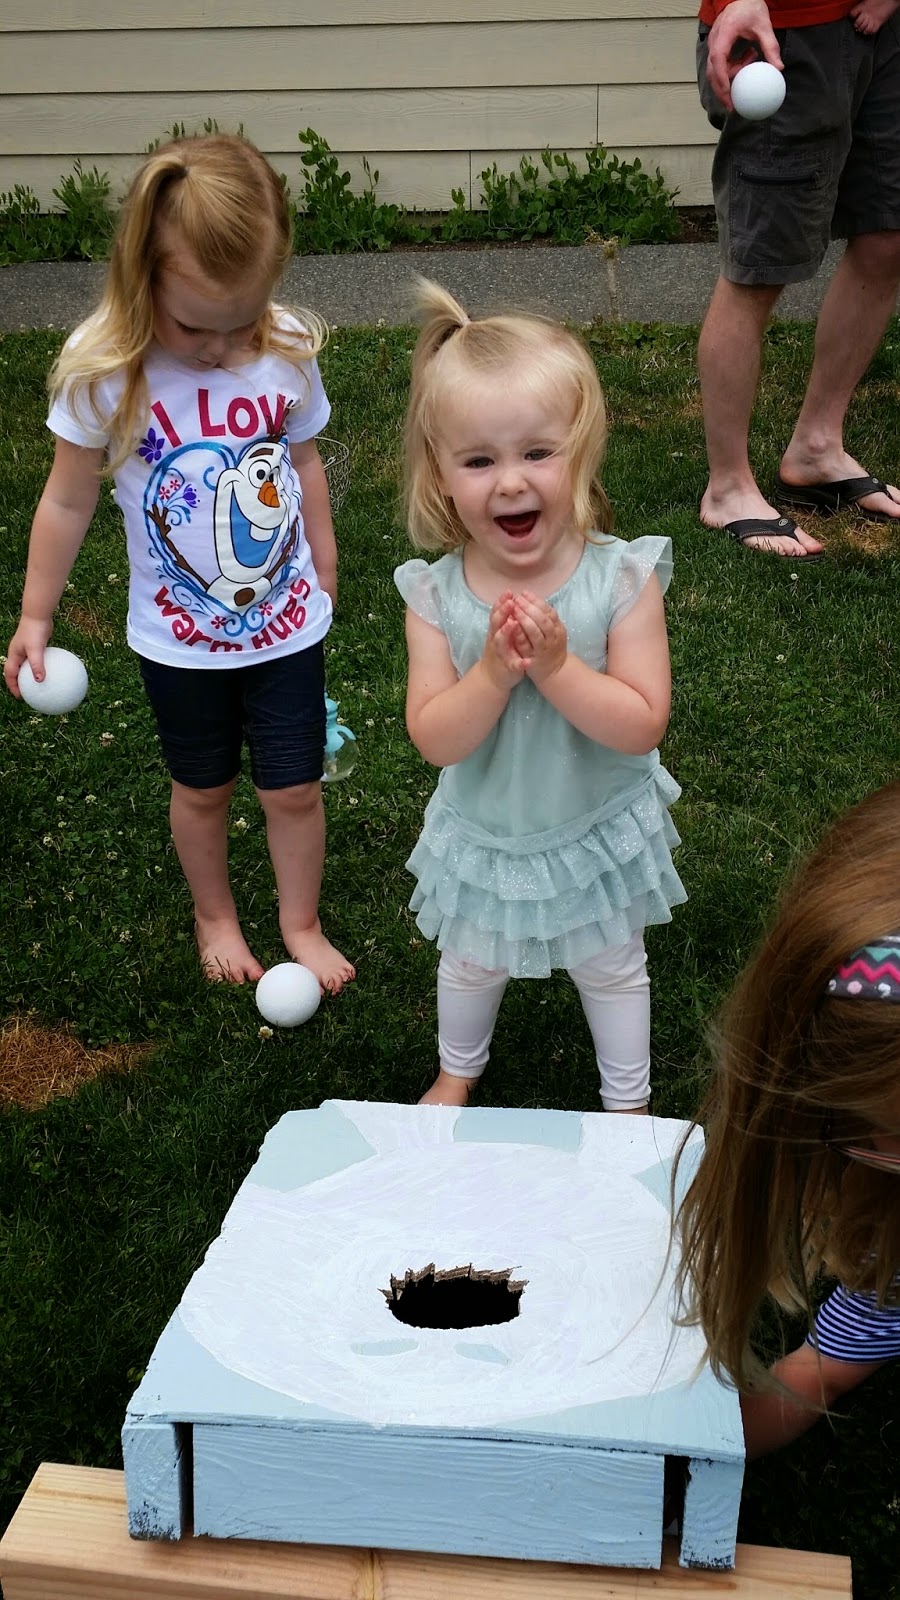
For another activity I painted this Ice Monster (not the best of my abilities, but it worked) on an old cornhole game we had lying in the yard. Then the kids could take turns trying to throw "snowballs" (styrofoam balls from the craft store) into the hole. I decided to make it easy and just give a prize to anyone that could make it into the hole. Preferably standing at a distance, but that didn't really happen. I figured making teams and all that would be too many rules for a 4 year old birthday party, so I just let them go at it. I then had a box full of extras from the goodybags that I just had each child pick a prize from.   

The game was a hit.
Even Peanut gave it a try.


The Favors:
I had a hard time deciding what kind of box or bag I wanted to use for the favor bags. I ended up putting some together using plain blue bags with little doilies (to look like snowflakes) and Frozen stickers. I think they turned out perfect.


A peek inside the goodybag.

The Cake:
I made the cake four layers of this really yummy vanilla/almond meringue cake with nutella creme between each layer (because Anna and Elsa love chocolate) and then topped with almond frosting. For the "Ice" (I found this idea on Pinterest) I melted down blue jolly ranchers, let them cool, then broke them into jagged pieces to create Elsa's Castle. It was the most fun cake I think I have made and I am really proud!

You can see my Custom Birthday Candle in all its glory. Good news. It didn't explode!

The Princess and her cake.

Hope you enjoyed viewing our 4 year old's Frozen birthday party. Can't wait to find out what next year's theme will be!