Thursday, September 19, 2013

Lavender Spider Spray

Its that time of year again. As much as I don't want to admit it, as much as I hope that if I ignore it, it will go away.....its here. Spider season. Now that I have killed about 20 of them in my home (one of which was a JUMPING spider!) and know the location of 2 live ones at this very moment, it can't be ignored anymore. Time to pull out the big guns. Today I am going to share with you my two methods for deterring spiders and bugs. Last year we did some painting in the house and needed to use the ladder to get to some high places. This ended up bringing about the hatching of hundreds of spiders in our HOUSE! So yeah, I have learned a trick or two to getting rid of them, naturally.

Method 1. Lavender Spider Spray (AKA, The Secret Weapon. Or I will drown you in spray if you even THINK about showing your nasty self in my bedroom)

You will need:
A 20-26 ounce spray bottle (Mine is from Home Depot)
Dish soap
Vinegar
Tea Tree Essential Oil
Lavender Essential Oil (Citrus is supposed to be a strong spider deterrent, I just didn't have it)
Water
A funnel is also useful

Directions:
Pour 20 drops each of Lavender and Tea Tree essential oils in the spray bottle. Then pour 1/4 cup each of dish soap and vinegar. Fill the rest of the way up with warm water, then shake to mix.

Spiders. Be warned.
You can pretty much spray this anywhere as it is all natural and safe for kids. It does leave a soapy residue though, so you need to spray it on a washcloth, then wipe with the cloth. I do it everywhere. Baseboards, on the inside and outside of door jams and windowsills. Anywhere you think a spider can get into your house, that's where you should spray. I just take the bottle and go room by room and spray everywhere. Outside the house too. You may just find a few victims out there. Apparently the vinegar is supposed to kill the spiders with its acidity. Mwah HA HA HA! Die suckers!!!

 Method 2. Rosemary/Thyme bunches (AKA Stealth Bombs)

You will need:
Cheesecloth (you can find at many food stores or grocery stores. I actually found mine at Bed Bath and Beyond)
String
Dried Thyme
Dried Rosemary
Rosemary Essential Oil or Thyme Essential oil

Directions: Cut 6, approx. 4X4 inch squares of cheesecloth. They do not need to be perfect.

Pour about a teaspoon each of dried thyme and rosemary (dried lavender is also good if you have it), then put 2-3 drops of Rosemary essential oil on each pile of herbs.

If you're wondering if I feel like a drug dealer or a witch making potions when I am doing this, the answer is yes. I prefer to think of myself as making magic potions to frighten evil spirits away.
Next you tie the bundles into little sachets with string and trim any excess string or cheesecloth.


Armed and ready.
Place in windowsills, in the corners of bathrooms, anywhere you have seen bugs lately and these awesome little bags will discourage bugs from coming near. They don't like the smell of these herbs. I like to keep one on my nightstand to keep them away from me when I'm sleeping. If you have children or pets (which I have both) make sure to keep hidden so that you don't end up with a baby with a mouth full of rosemary. Every once in a while Princess will get curious as to what it is, so then I just move it to another location.

There you have it. My 2 secret weapons for deterring evil spiders. The great thing is that they are both all natural, so if your dog or baby does end up eating a mouthful of it, chances are they'll be ok and you don't have to worry about having nasty chemicals around. Good luck scaring away your little evil spirits.

Tuesday, September 17, 2013

Decoupaged Glasses

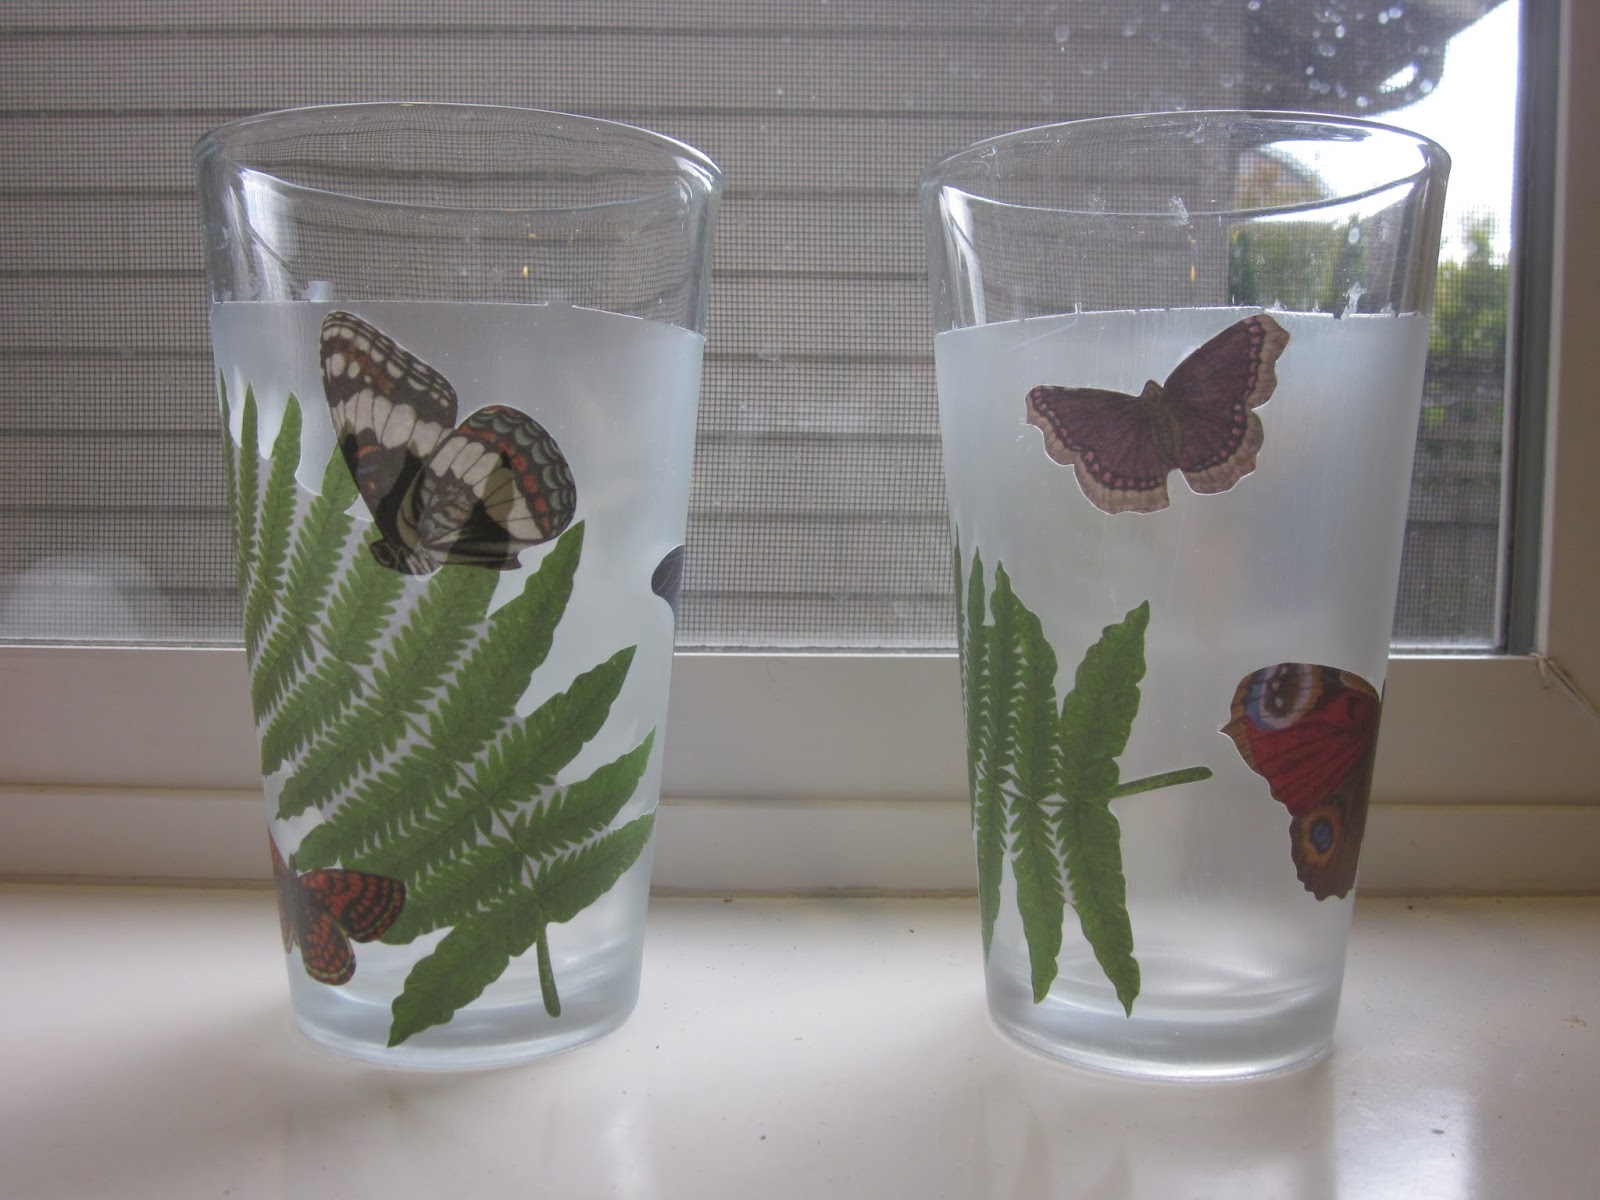
Today I am taking it from the goddess of crafts. Ms. Martha Stewart herself. I found these adorable decoupaged glasses on Eclectically Vintage and was in love. I was able to find the same decoupage from Martha at Micheal's. Totally being a copycat today because I simply love the way her glasses turned out. Now some people would think this a little odd, because I have an unusual fear of butterflies. Yep, I think they are freaking scary. And although I have been inside one of those butterfly houses (for a little girl I was nannying...It was a nightmare) I was sweating the whole time. Allow me to explain. Don't get me wrong, I think they are pretty and all. But have you ever seen one up close? Looked at their bodies and those nasty antennae and legs? Ugh! It gives me shivers just thinking about it. I think they are gross and if any butterfly gets near me I freak out. But anyway, these ones aren't real. They are paper, and there is no nastiness about them, because they are fake. So I get all the beauty and none of the creeps. Moving on.

What you will need for this project:
Martha Stewart decoupage paper cutouts (or any pretty paper you may have)
Martha Stewart durable matte finish decoupage glue
Glasses or ceramic dishes (Can also be applied to wood, metal or paper)
Paint brush
Blue painters tape

1. Tape around the rim of the glass with the blue painters tape. This is to protect you from sipping glue each time you use the glass. :)

2. Paint the entire surface of the glass with the glue in a light layer, then on your first piece of decoupage paper. Place on the glass and continue with until your design is finished.

3. Apply a light layer of decoupage glue to the entire surface. Then let dry. Repeat for 2-3 coats.

4. Set the glass out on the counter and allow to "cure" for 21 days. This makes them dishwasher safe. Yay!

Your glasses will have a slight "frosted" look.

My painter's tape job was horrible. So make sure yours lays flush against the glass!

I am so happy with these and excited to add a little color to my glass collection. Clear glasses go with everything, but these are way more fun! Perfect glasses for outdoor parties!

Monday, September 16, 2013

Revamped Lamp #2

Good morning. I can't believe its already the start of another week. The weekends go by way too fast. I'm out of coffee today too, so you can probably guess how I feel right now..... Not excited about life. So please excuse me if this post is 1. posted later than normal, 2. boring and/or 3. sloppy. Today I am going to show you another way to "revamp" a lamp.  The girl's bedroom lamp was in need of a new look. It was a lamp that was from the bedroom my sister and I shared years ago. So it was definitely showing age. It started out as a pale green color and now has faded into an almost white, light green.


It's kinda hard to tell in the photo, but I also discovered that it had a hole in it that needed fixing.

It also completely broke off the metal framing piece when I took it off the lamp base. So not only did it need some fluff, it also needed a bit of doctoring up before I even started.

A little masking tape did the trick. It actually looked like that's what was holding it together before. It looked like dried up, crispy old masking tape. Weird.
This lamp was inspired by those adorable Pottery Barn Kids lampshades (that BTW are $99 each! Yikes). Anyway if you want to revamp a lamp like this one, here is what you will need:

Lamp shade
Fake flowers, roughly the same size (I used 8 bunches of fake "spray roses". Bought on sale I got them for $40 all together. Not the cheapest, but still much better than $99)
Hot glue gun


1. Start by cutting all the stems off the flowers.

2. Then, starting at the bottom, glue the flowers all the way around the base of the lampshade.


3. After you finish one row, continue until the shade is completely covered.

 Almost there!

4. Then you are finished. Allow to cool, take any stray strands of hot glue off your lampshade and then place on your lamp base.

 Gorgeous! I love being able to re-create things that are normally way too expensive!


This was so easy and turned out to be another great way to revamp a lamp. So girly, princess-y and fun! Hope you enjoyed!

Friday, September 13, 2013

FP Inspired Robe

I can't tell you how long I have wanted a "kimono" style, silky robe. I think I saw a woman in a movie once who had one and I just thought she looked so beautiful, so elegant and yeah, a little bit sexy. Ever since then I have kept my eye out for the perfect one. I think I am doomed to being awkward and dorky for the rest of my life, but I always wanted to at least pretend to be elegant. Google searching "kimono" only brings up the true Asian kimonos, which was not exactly what I was going for and the Free People ones that I coveted were usually around $200. Plan B. Make my own. I can't tell you how nervous I was about making this. I bought the fabric weeks ago but I couldn't take it out of the bag for fear of ruining it. Whatever type of fabric it is, (silk chiffon? rayon?) its very delicate and would not be forgiving if some idiot attempting to make something out of it messed it up. But after having a few projects where I came up short for supplies, it was my only option. Deep breath!!!

Here is the inspiration for this project.
Ruffle Kaftan
Free People. So pretty with the ruffle!
 Free People Bette Bed Jacket, $118.00
Another Free People. This is the basic style I was going for, but I wanted something with a more colorful print.

Bridal Suite Idea #7: Printed silk robes
This one I found on Pinterest. Love the print, but I wanted mine to be a little less "robe" like.

Stunning summer kaftan.
Love that this one is so long! Anyway, now I think you get what I'm going for here.

What you will need:
3 yards of (I honestly don't know what it is, silky chiffon, rayon something like that. Whatever you want the texture of your robe to be)
36 inches of shear, delicate ribbon (for the ties)
Cream or matching colored thread
Sewing machine
Pins
Scissors
A lot of patience for all the pinning you will be doing!

The gorgeous fabric that I found. Note: This fabric is normally $37 per yard! Lucky I got it at half off, but if it had not been on sale I wouldn't have been saving as much money by making my own. Getting it on sale allowed me to make my own for 1/4th of the cost. So if you want to make your own, I suggest waiting for a sale. Mine just happened to go on sale right as they were taking out "Summer" fabrics and replacing them with Fall stuff.  

1. Try on the piece of fabric as if it was finished already to get an idea of how long you want it all to be. Its pretty much in the shape it needs to be already, so we are just making some seams. I will give you directions for the way I did it. But remember, I am 5'8", so I may be taller than some! So try it on several times throughout to make sure its fitting. Cut off 11 inches from one of the long sides of the piece, which when put on is the back of the robe. I would have cut a little bit less in a perfect world. Probably 9 inches, but once its cut, its cut!

 Make sure that you measure the entire way, so that it is an even cut.
2. Then fold both long sides over about 1/4 inch, then fold another 1/4 inch and pin. This takes a long time and a lot of patience because you are pinning down 6 yards of fabric and the material is so flimsy! But its worth it I swear! Don't iron if you have a similar fabric to mine because you will melt the fabric.

 3. Sew the seams on both of the long sides. Repeat steps 2 and 3 for the short sides of the fabric.
4. Try on again and hold your arms out so that the fabric falls on where you will want the "sleeves" to be. Place a safety pin through the front part of the robe to the back part of the robe, making a small hole (just large enough for you to put your hand through) for your wrists.
5. Here is an example of one. The loops I made ended up being about 10 inches from the front bottom of the fabric (if you are wearing it). But it is all preference and where you feel like your arms will be most comfortable. Sew a small stitch to close both of the holes. Make sure you reverse as well so it doesn't unravel.
6. Then decide where you want the ties to be. Again, trying on is a good idea. Place a safety pin where you want the ties to go. I put mine 17 inches from the top.

 7. Burn the edges of your ribbon so that it doesn't fray and sew on either side of the robe.
Now you have an elegant robe for lounging and looking gorgeous around the house. Note: Do not wash in the washing machine. This is not the type of robe you are going be stepping out of the shower into, so you shouldn't need to anyway. But I would dry clean if necessary.
 Here's the front.
By the way, I am totally wearing shorts!
 The back. See how I would have kept like 2 inches on it?
 The side. Don't mind our taped up bathroom!
 The length of the front.
I felt like I needed to give you a profile shot, because I am always taking pictures of my babies and no one ever sees me! And its my blog! So here you go. Me happy in my new robe!
Hope you enjoyed this post. Let me know if you have any questions! Happy Friday and have a great weekend everybody!