Tuesday, July 22, 2014

Frozen Birthday Party

Well, we somehow survived the great big FROZEN birthday party! My little girl is officially 4, most of the decorations are put away and I am so glad I don't have to plan another birthday party until next year! It was super crazy, (I think we had about 20 adults and 12 kids!) but I think it was a success. I know at least Princess had fun. All she really cared about was getting to play with her cousins and friends (and when I say "play", I mean running around screaming like crazy). I had to talk her into stopping for a second just to eat cake! Just goes to show that you don't need much to please kids. It all came and went in a flurry and the little miss was pretty upset when I had to take the decorations down. It was pretty. Oh well, at least she gets to hang on to the giant sized Elsa, Anna and Olaf. I'm sure they will be permanent fixtures in the playroom for awhile. Here are the pics of Princess's big day. 

The Invitations:
I had a really hard time picking ones that I liked. I'm picky about my Elsas. I ended up ordering a design off etsy.com and then taking them to a printer and then glued them onto thick cardstock myself. No one would print them on cardstock that was heavy duty! I couldn't believe it since that's been so popular lately. I had two different kinds of backing for the invites. White sparkly and blue snowflakes.


The Decor: 
Since this Frozen obsession has been going on in our house for awhile, it was kind of nice because I could use any Frozen toys that the girls had as decoration. Love that toys can be duel purpose for a party!


These girls needed a little hair styling before the party. I wish that doll hair didn't come out so easily. It's impossible to make it look like it did coming out of the box!

Of course Elsa, Anna and Olaf were invited. It wouldn't be a party without Olaf!


Our snowy wonderland.
Oh, and it was so great, my sister in law gave Princess a bubble machine for her birthday and it was perfect for putting outside and giving the effect of snow. My husband originally wanted to get a snow machine for the day, but a bubble machine was the perfect substitute. Not to mention a whole ton cheaper.

Our good old "Happy Birthday" sign. The day of her birthday, Princess kept pointing to the wall saying, "No Mom, it's not a birthday!" and I think she was trying to tell me that I had to put this sign up! Bad Mamma!

We weren't sure if we were going to be able to bring the party into this room or not. My husband was busily building this dining room table at the last minute so that we could have a place for the kids to sit (we have always just used my mother-in-law's folding tables and it was time for an upgrade!). We literally placed the table top on the base of the table minutes before the party started. It's not quite finished yet, but its going to be an amazing table. Look for the post on the table in weeks to come.


At each place, we had a little snowman building activity for the kids to do when they arrived at the party with "Do you wanna build a snowman?" tags I bought off etsy.com. It was great. They loved it. We gave them the choice of taking their "Olafs" home or eating them. Some chose to eat the parts before building. It was perfect because it was age appropriate for a lot of kids. And little miss Princess has friends that are younger and older than her, so this idea worked great for her party.

Each treat bag had 2 pretzel sticks ( for arms), 2 mini chocolate chips (for eyes), 3 mini chocolate brown M&M's (for buttons), 1 candy corn (nose), 3 large marshmallows (body) and 2 small marshmallows (feet). Then I just had a bowl of plain icing on the table for everyone to use as the "glue" to assemble the snowmen.

Our balloon arrangement was not behaving for pictures. 

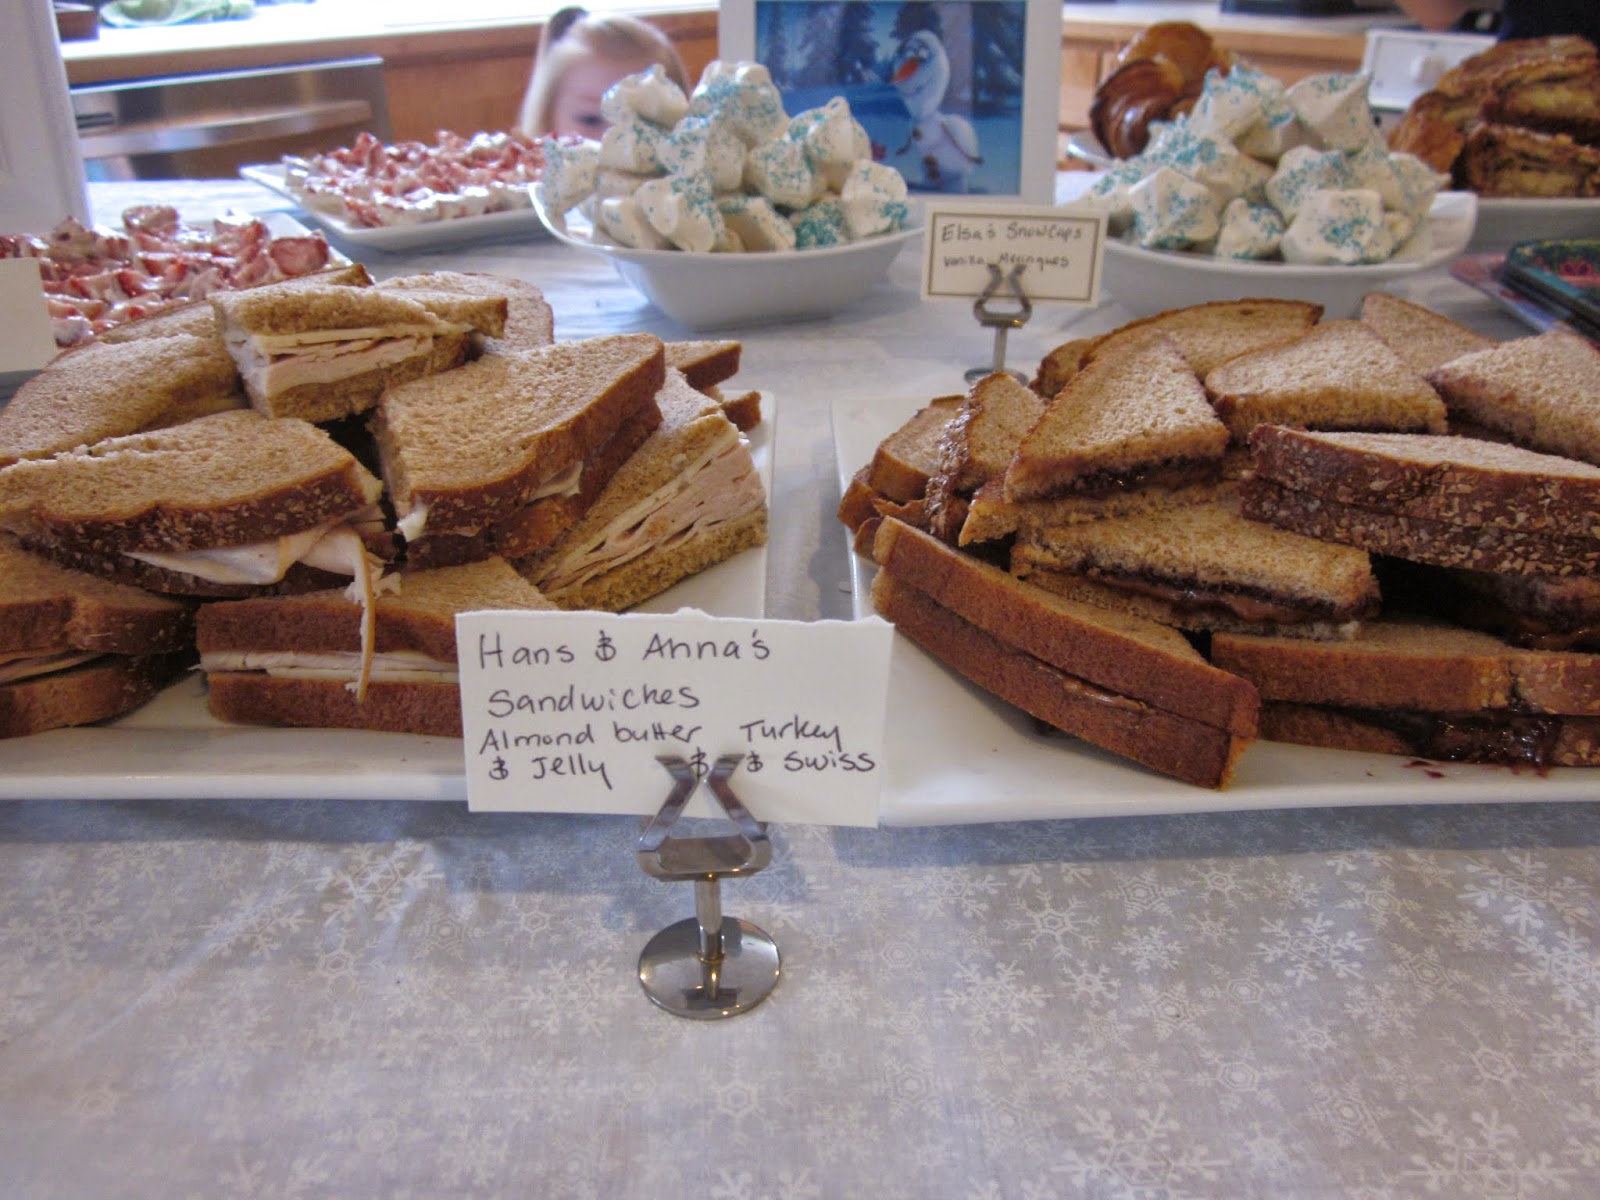
All of our Frozen themed treats and food. I made the tablecloth with white snowflake print cotton (I'm actually surprised I was able to find snowflakes in June!) and tassels just like the ones on Anna's cape.


The Food:
We had "Snowballs" (Powdered sugar doughnut holes),

"Hans and Anna Sandwiches" (Almond butter and Jelly and Turkey and Swiss),

"Olaf Noses" (Cut carrots with a Paleo ranch dip), "Troll Clubs" (Corndogs),

"Anna's Frozen Hearts" (Honey yogurt covered frozen strawberries)

"Elsa's Snowcaps" (I just made vanilla meringues using my old meringues recipe and topped them with blue sugar sprinkles),

My sister brought some amazing filled croissants from this French bakery in Seattle that were a great addition for the adults. :)

And of course we had to have some "Elsa's Icey Blue Punch" (basically a mix of blue Kool Aid packets, Sprite, raspberry lemonade and water) to wash everything down. And it was especially good post party mixed with a little champagne :)

The Fun:
For another activity I painted this Ice Monster (not the best of my abilities, but it worked) on an old cornhole game we had lying in the yard. Then the kids could take turns trying to throw "snowballs" (styrofoam balls from the craft store) into the hole. I decided to make it easy and just give a prize to anyone that could make it into the hole. Preferably standing at a distance, but that didn't really happen. I figured making teams and all that would be too many rules for a 4 year old birthday party, so I just let them go at it. I then had a box full of extras from the goodybags that I just had each child pick a prize from.   

The game was a hit.
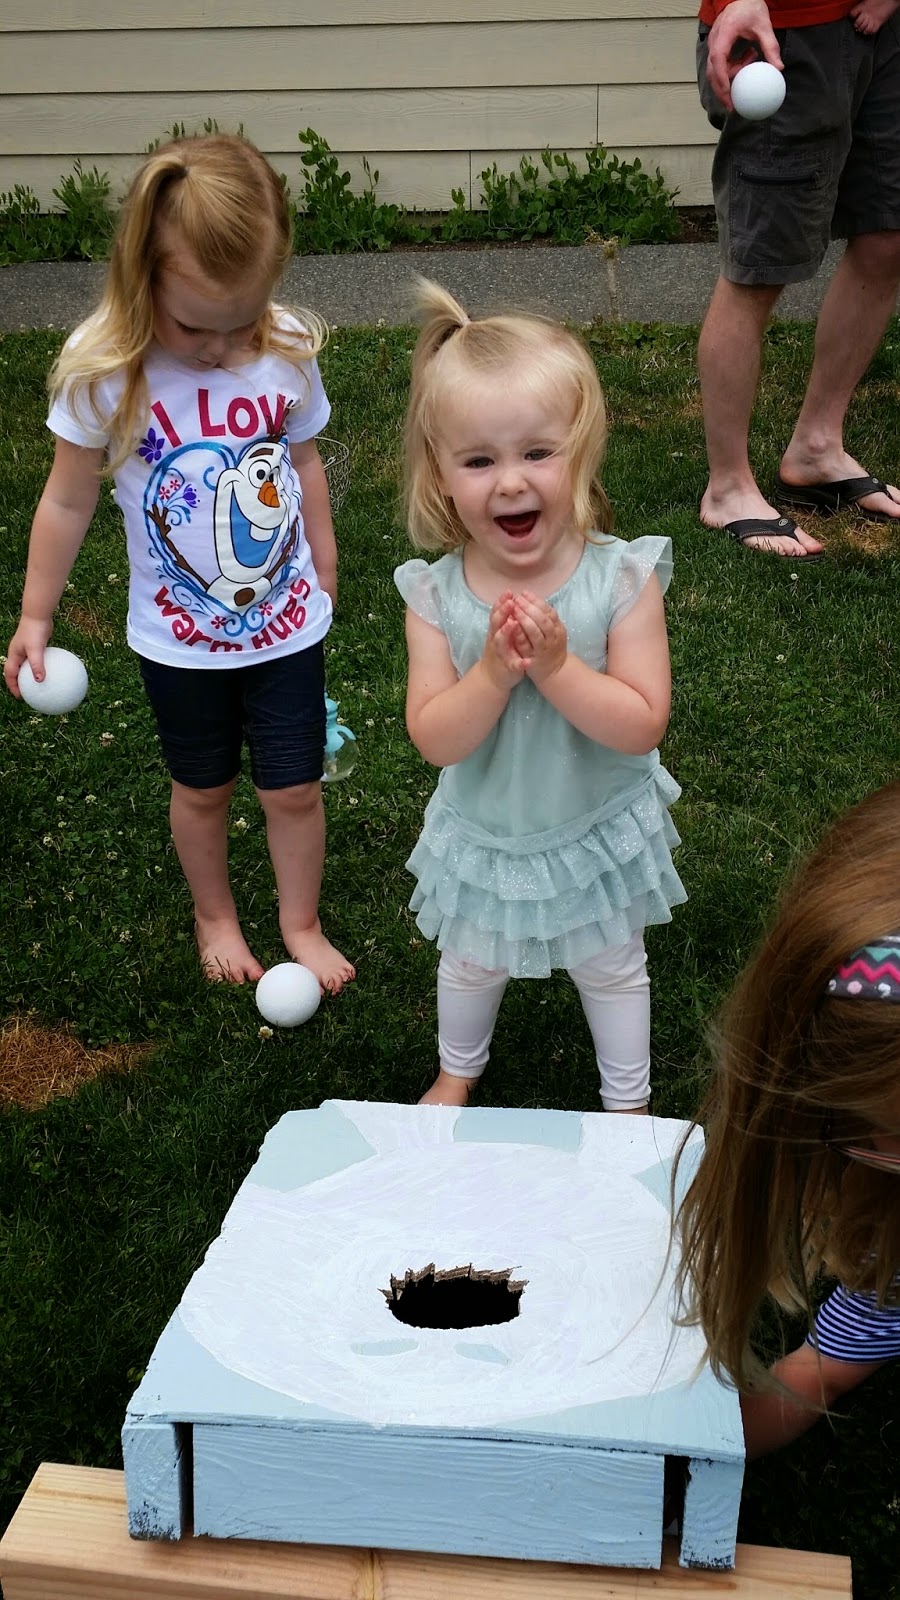
Even Peanut gave it a try.


The Favors:
I had a hard time deciding what kind of box or bag I wanted to use for the favor bags. I ended up putting some together using plain blue bags with little doilies (to look like snowflakes) and Frozen stickers. I think they turned out perfect.


A peek inside the goodybag.

The Cake:
I made the cake four layers of this really yummy vanilla/almond meringue cake with nutella creme between each layer (because Anna and Elsa love chocolate) and then topped with almond frosting. For the "Ice" (I found this idea on Pinterest) I melted down blue jolly ranchers, let them cool, then broke them into jagged pieces to create Elsa's Castle. It was the most fun cake I think I have made and I am really proud!

You can see my Custom Birthday Candle in all its glory. Good news. It didn't explode!

The Princess and her cake.

Hope you enjoyed viewing our 4 year old's Frozen birthday party. Can't wait to find out what next year's theme will be!

Friday, July 18, 2014

Custom Birthday Candle

Today is my oldest daughter's 4th birthday. I can't believe it. Princess is 4 today! It is so strange to watch your own child grow. Now she is no longer a baby, but a little girl; learning new things and becoming her own person. Its incredible and so bittersweet. Its hard to believe that four years ago today I was in labor and waiting anxiously for her to come out. Now she is four years old and the friendliest, most beautiful little girl. And starting full time pre-school in the Fall! I can't take it!

Here she is only a few days old in July 2010
I can't look at this picture without getting baby fever. So precious!

And here she is today. July 18th, 2014
Happy Birthday my sweet little girl! Momma loves you SO much! I hope you have a perfect birthday!

Every birthday girl needs a birthday cake and every birthday cake needs a birthday candle. Here is how I made a custom (Frozen themed of course) birthday candle for Princess's birthday.


You will need:
A number birthday candle (found at most party stores, grocery stores, etc.)
Tiny beads or seeds beads (in the color of your choice)
Craft paint (in the color of your choice)
Small paint brush
Glue (I used the natural Elmer's glue, but you can use the regular kind as well)
Lots of glitter
Spray adhesive
Embellishments (I found a snowflake button to add a little flare to the candle. You can find all kind of themed buttons or beads just like these at your local craft store)

1. Start by painting the the outline of the candle in the color that matches your party's theme. I did light blue/"Elsa blue" to go with our Frozen theme. You will need to do about two coats as the wax doesn't hold the paint very well. But don't worry, it works.

Depending on the number, you may need to paint an inside line as well.

2. Once the paint is dry, spread a layer of glue inside the ridges of the candle and then cover with an assortment of the tiny beads. It looks great if they are just mixed up and randomly placed.


3. Using a toothpick or any other small tool, scrape off any stray beads, where they don't belong. Then add your snowflake button or other embellishment if you have one. Let the glue dry completely.


4. Spray a good amount of spray adhesive all over the candle to hold everything in. Then sprinkle dry glitter over the top. Note: The spray adhesive is flammable, so make sure to dry your candle completely before lighting and don't let it burn for too long. I haven't tested mine yet to see if it causes an explosion... but it shouldn't. It won't be lit very long anyway. If you are worried, then sing "Happy Birthday" quick!


Then you're finished. Isn't that pretty!? Its kind of a cool way to make those boring birthday candles into something really special. And its great because you can customize the colors, beads and paint to fit with whatever birthday theme you are having. I'm off to go hang out with my little 4 year old. Have a great weekend everyone. Check in next week to see the big FROZEN party reveal!

Thursday, July 17, 2014

Snow Flurry Garlands

The time has come! Princess's 4th birthday party is this weekend. We have been talking (and when I say we I mean Princess, who invites total strangers to her party) about this FROZEN birthday party for months. We saw it in theaters twice and what was that, back in December? So yeah, we have been dreaming up this FROZEN themed birthday party for about 6 months. I can't tell you how excited I am to have this party and all talk of Frozen behind us. Somehow I feel like this party isn't gonna help my case. ;) Anyway, this week I have been busy creating snow themed decorations and food and oh yeah....there's a life size Anna, Elsa and Olaf hiding in the closet. It's gonna be awesome though! I always get so excited to plan my daughter's parties and then the week of the party I am always like, "Is this too much? How did I get myself into this?". But then my maybe not so better judgement is always like, "Whatever! This is gonna be the best party EVER!" And then I just keep on going. The show must go on! I made these snowy garlands to hang in doorways and entrances to make the cold, snowy Frozen world a little more real for the party. Being July, its bound to be like 80 degrees. I love that they are a cheap and easy homemade decoration and they actually look kind of modern. These would be fun to make for Christmas as well. Here is the how to.

You will need:
A heavy duty needle
White thread
White pom poms in varying sizes (I also used regular cotton balls, but the pom poms worked better)
Scissors
Scotch tape for hanging

1. Start by cutting a length of thread the length you want it to hang in the doorway. (I varied the lengths of each garland.) Tie a double knot on one side.

2. Thread the needle, then one at a time, start threading the pom poms on right through the center. No need to have a perfect pattern. The more variation the more real it looks. Snowflakes have no pattern! Be very careful as these garlands can tangle VERY easily. I suggest working on the floor, so that you can lay it out as you go.


3. When you have threaded as many as you want, make a loop at the top. Hang with scotch tape.


4. Repeat several more times to get a full, snowy look.


Pretty!

You'll see more of these snowy decorations and much more when I post about her party next week, so stay tuned!